How to use Google Voice
Google Voice is one of those services of which people tend to say, “Is that still around? Does anyone still use it?” But don’t be fooled by its longevity: people do still use it — and it’s possible that you may want to as well.
Originally called GrandCentral before it was bought by Google in 2009 and only intermittently updated since, Voice is a telecommunications service that works in conjunction with your existing phone service and offers a free secondary phone number with voicemail, SMS capabilities, and other services. Once your number is assigned (you are given a variety to choose from), you can associate it with one or several cellular or landline phone numbers.
When I first signed up for Google Voice in 2009, phone carriers were still making it unnecessarily difficult to move your phone number if you were changing carriers, so having a phone number that easily moved to whatever device you wanted to use made life a lot easier. That’s no longer the case; but over the years, I’ve found Voice immensely helpful in a number of other ways.
For example, it’s useful if you have more than one phone, and want to make sure that the important people in your life can easily find you; if they call your Voice number, you can set Voice to ring all of your phones. You can create a separate business number on your personal phone. It’s helpful if you occasionally use temporary phones (for example, I found it very handy when I was reviewing phones and wanted to carry one around with me for a couple of weeks). You can have a number to give to vendors and organizations that you want to keep in touch with, but which might sell the number to spam callers. And so on.
Google Voice is, of course, not the only service that offers additional numbers for your phone; there are other services out there as well, such as Hushed and Burner. Although Voice’s interface is a bit old-fashioned (despite a relatively recent update), and (this being Google) there is always the chance that the company will suddenly decide to get rid of it, it’s a very good alternative.
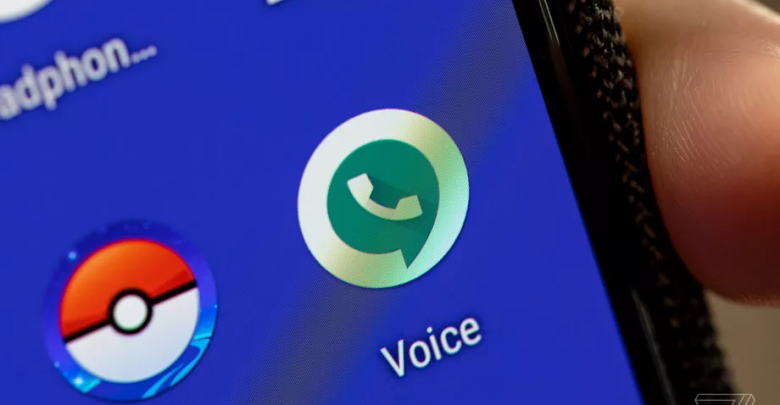
You can sign up for Google Voice either on the web or by downloading the Google Voice app from Google Play Store or Apple’s App Store. I found it slightly easier to do the initial sign-up via the web; however, the process is nearly identical on a mobile phone.
Sign up for Google Voice
- Go to https://voice.google.com/. If you haven’t already, sign in to your Google account; if you don’t have a Google account, you’ll be asked to create one. You can read the Terms of Service and the company’s Privacy Policy if you like. Do you accept them? Okay, press “Continue.”
- Choose your Google Voice number. Google will give you a choice of several locations in your region. If you don’t like the first few numbers, you can keep clicking on “Show More” until you find one you like. (Not ad infinitum, of course; eventually, you do run out.) Click on “Verify.” Verify what? Well, once you’ve selected your number, you have to verify that you have an existing phone number to associate with the Google Voice number.
- Note: you can only associate a single phone number with a Voice number. However, if you’ve already got a Google Voice number associated with your current number and you want another, there is a way around it — use another virtual number. For example, I was able to create a Google Voice number using a Hushed number, and you should be able to use a Skype number as well.
- You’ll be asked to enter your existing phone number so you can be texted a six-number code (if you don’t want to text, you can opt to receive a phone call). Once you’ve got the code, enter it where indicated.
Adjust Voice to suit your needs
Well, there are a number of adjustments you can make, depending on how you want to use the service. A few are described below. These were tested using the mobile app on an Android phone; the interface for iOS devices is similar.
All of the following tweaks are available in the Settings section of the app. If you’re using the Android app, reach them by tapping on the three parallel lines on the top left of the home screen, and then choosing Settings from the resulting menu.
Use Voice to make calls
- Scroll down to and tap on “Calls started from this device’s phone app.”
- Choose whether you want to make calls using your Google Voice number or your phone’s number. You can also choose which you want to use each time you make a call, or just use Voice for international calls. (Domestic calls through Google Voice are free, while international calls do have a fee. The fee for international calls is likely less than your carrier’s, however.)
Receive incoming calls using Voice
- Scroll down to and tap on “Call forwarding.”
- You’ll see a list of all the devices you’ve registered with Voice. Toggle “on” those that you want to use to receive Voice calls.
Change your voicemail greeting
- Scroll down to and tap on “Voicemail greeting.”
- You can use a general “The Google subscriber you have called is not available. Please leave a message after the tone,” or a slightly more personalized “<name of person> is not available. Please leave a message after the tone.” Or you can record your own.
Choose how you are notified when you have a message or miss a call.
Scroll down to and tap on “Message notifications” or “Missed call notifications.” There are a variety of options you have here; the choices are basically the same in both cases. Options include:
- Toggle notifications on and off.
- Display your notifications in the status bar.
- Use lock screen notifications.
- Choose a ringtone for a notification and / or vibrate the phone when a message comes in.
There are even more features available in the Google Voice settings menu. Besides those already mentioned, you can toggle “Do not disturb” on or off, so that all calls are sent immediately to voicemail; record all incoming calls; get transcripts of your voicemail via texts or email; hide your caller ID; and screen calls by hearing a caller’s name when you pick up.
Try Legacy Google Voice
Google revamped the web version of Google Voice in 2017, simplifying the interface so that it worked with the company’s Material Design. However, some users still prefer the older interface (especially since, despite the more crowded UI, you can more easily tweak some of the aspects of the service).
It’s worth checking out. To access the Legacy version of Google Voice:
- Go to the main site at https://voice.google.com.
- On the upper left corner of the window, click on the three parallel lines. This will open up the side menu (which before only showed a few icons) and will add an icon and label for Legacy Google Voice. Click on that.
- Take a look at your settings by clicking on the gear icon on the upper right corner.
Messaging with Google Voice
Any description of Voice would be incomplete if messaging wasn’t included. As with the phone number that comes with your phone’s SIM, you can use your Google Voice app to text to any number that uses SMS; the app will use your Voice number.
Unfortunately, however, Google’s other apps aren’t all that friendly to Voice messaging. While you can call others using Voice and they will see your Voice phone number, if you text to someone using an app other than Voice (say, Google’s Messages app), the recipient will see the text as coming from the number of your phone’s SIM rather than your Voice number.
There is one exception: you can use Google’s Hangouts app to send and receive text messages using your Voice number (and only your Voice number; Hangouts stopped being a general SMS app back in 2017). What will eventually happen to Hangouts is still up in the air (it’s due to be sunsetted for G Suite customers this coming October), but it is an option.
source: theverge.com


